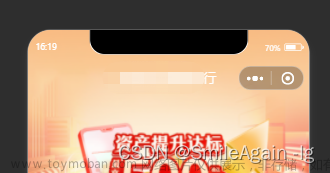
参考链接,第二个链接下滑时导航栏变白色好用微信小程序自定义navigationBar顶部导航栏,兼容适配所有机型(附完整案例)_小程序自定义导航栏-CSDN博客
【微信小程序开发(二)】自定义导航栏_微信小程序分类导航栏-CSDN博客
一.创建navBar组件
1.components下创建navBar文件夹

项目用到该组件的的页面比较多,所以获取高度写到app.js
app.js
App({
   onLaunch(options) {
    const that = this;
    // 获取系统信息
    const systemInfo = wx.getSystemInfoSync();
    // 胶囊按钮位置信息
    const menuButtonInfo = wx.getMenuButtonBoundingClientRect();
    // 导航栏高度 = 状态栏高度 + 44
    that.globalData.navBarHeight = systemInfo.statusBarHeight + 44;
    that.globalData.menuRight = systemInfo.screenWidth - menuButtonInfo.right;
    that.globalData.menuTop = menuButtonInfo.top;
    that.globalData.menuHeight = menuButtonInfo.height;
  },
  // 数据都是根据当前机型进行计算,这样的方式兼容大部分机器
  globalData: {
    userInfo: null,
    navBarHeight: 0, // 导航栏高度
    menuRight: 0, // 胶囊距右方间距(方保持左、右间距一致)
    menuTop: 0, // 胶囊距顶部间距
    menuHeight: 0, // 胶囊高度(自定义内容可与胶囊高度保证一致)
})
navBar可能代码缺失,因为只贴主要代码
navBar.wxml
<!-- 自定义顶部栏 -->
<view class="nav-bar" style="height:{{navBarHeight}}px;width: 100%;" class="{{backType=='login'?'backFFF':''}}">
  <view>
    <view style="height:{{menuHeight}}px; min-height:{{menuHeight}}px; line-height:{{menuHeight}}px; left:{{menuRight}}px; top:{{menuTop}}px;">
      <view wx:if="{{backType=='noBack'}}" class="bg-op2" ></view>
      <view wx:else class="bg-op" style="opacity:{{opacity}};"></view>
      <view style="position: absolute;top:{{menuTop}}px;" class="left-icon" bindtap="navigateBack">
        <image src="png" mode='widthFix'></image>
      </view>
      <view class="title" style="text-align:center;font-size: 28rpx;padding-top:{{menuTop}}px;">{{title}}</view>
      <view class="icon"></view>
    </view>
  </view>
</view>
navBar.js
// components/navBar/navBar.js
const app = getApp()
Component({
  properties: {
    title: {
      type: String,
      value: ''
    },
    backType: {
      type: String,
      value: ''
    },
    toBack: {
      type: String,
      value: ''
    },
    scrollTop: {
      type: String,
      value: '0',
      observer: 'update', // 类似于vue的 watch 动态传值
    },
  },
  data: {
    opacity: 0,
    navBarHeight: app.globalData.navBarHeight,
    menuRight: app.globalData.menuRight,
    menuTop: app.globalData.menuTop,
    menuHeight: app.globalData.menuHeight,
  },
  attached: function () {

  },
  onPageScroll(t) {
    this.setData({
      scrollTop: t.scrollTop
    })
    console.log('scrollTop',this.data.scrollTop)
  },
  methods: {
    navigateBack: function () {
      if(this.data.toBack=='function'){
        wx.switchTab({
          url: ''
        })
      }else{
        wx.navigateBack({
          delta: 1,
        })
      }
    },
    update(newValue) {
      let op = 0;
      if (newValue != 0 && newValue <= 40) {
        op = newValue / 40
      }
      if (newValue >= 40) {
        op = 1;
      }
      this.setData({
        opacity: op
      })
    },
    parentClose: function () {
      debugger
      this.triggerEvent('parentClose');
    },

  }
})
navBar.wxss
/* component/navBar/navBar.wxss */
.nav-bar {
  position: fixed;
  width: 100%;
  top: 0;
  color: #fff;
  z-index: 9999;
}

.backFFF {
  background-color: #FFFFFF;
}

/* .nav-bar .search {
  width: 60%;
  color: #333;
  font-size: 14px;
  background: #fff;
  position: absolute;
  border-radius: 50px;
  background: #ddd;
  padding-left: 14px;
} */

/* 原始 */
.back-nav-bar {
  /* height: 64rpx; */
  width: 100vw;
  display: flex;
  flex-direction: row;
  justify-content: space-between;
  align-items: center;
  z-index: 999;
  position: relative;
}

.bg-op {
  position: absolute;
  width: 100%;
  bottom: 0;
  left: 0;
  /* background: linear-gradient(180deg, #C1CFE5 0%, #DEE4EE 100%); */
  background: #FFFFFF;
  z-index: -1;
}

.bg-op2 {
  position: absolute;
  width: 100%;
  bottom: 0;
  left: 0;
  z-index: -1;
}

.left-icon {
  margin-left: 20rpx;
  padding-right: 50rpx;
}

.left-icon image {
  width: 20rpx;
  height: 38rpx;
  padding-top: 10rpx;
}

.left-icon2 {
  margin-left: 20rpx;
}

.left-icon2 image {
  width: 50rpx;
  height: 45rpx;
  padding-top: 6rpx;
}

.icon {
  width: 40rpx;
  height: 45rpx;
}
navBar.json
{
  "component": true,
  "usingComponents": {}
}
二.隐藏原生的navigationBar
1.需要全局设为自定义。
app.json里面window全局配置里有个参数:navigationStyle(导航栏样式),default=默认样式,custom=自定义样式。自定义需要配置为custom
"window": {
	"navigationStyle": "custom"
}
2.指定页面设为自定义。
在需要使用自定义组件navBar的页面的json文件里面,设置navigationStyle为custom,并且引入组件
{
  "component": true,
  "navigationStyle": "custom",
  "usingComponents": {
    "navBar": "/components/navBar/navBar",
  }
}
三.父页面使用navBar组件
父页面wxml文件文章来源:https://www.toymoban.com/news/detail-857208.html
<navBar backType="editLaw" bind:parentClose="parentClose" title="{{navigaTitle}}"></navBar>父页面js文件文章来源地址https://www.toymoban.com/news/detail-857208.html
parentClose: function () {
   this.triggerEvent('parentClose');
},
到了这里,关于微信小程序自定义导航栏navBar组件的文章就介绍完了。如果您还想了解更多内容,请在右上角搜索TOY模板网以前的文章或继续浏览下面的相关文章,希望大家以后多多支持TOY模板网!


