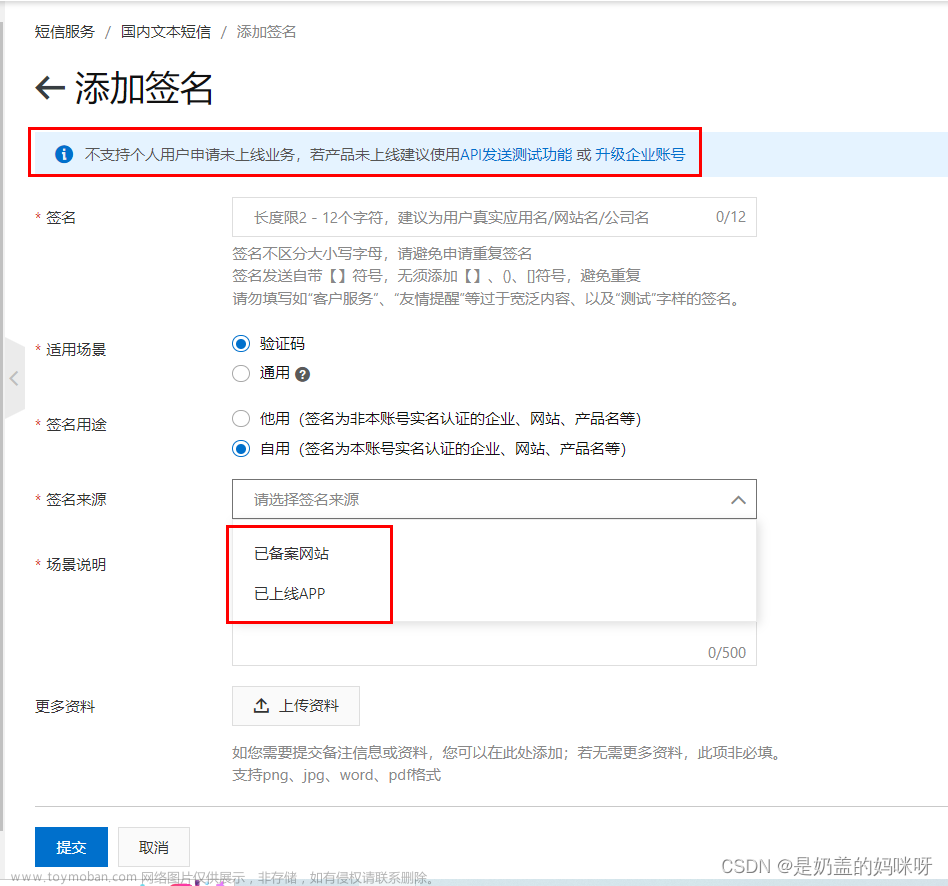
详细介绍SpringBoot整合阿里云短信服务的每一步过程,同时会将验证码存放到Redis中并设置过期时间,尽量保证实战的同时也让没做过的好兄弟也能实现发短信的功能~
步骤1: 注册阿里云账号和创建Access Key
首先,你需要注册一个阿里云账号(如果还没有),然后在控制台中创建Access Key。这个Access Key将用于通过API调用阿里云短信服务。在控制台中创建Access Key非常简单,只需遵循阿里云的步骤即可。
步骤2: 添加阿里云短信和Spring Boot Redis依赖
在你的Spring Boot项目中,你需要添加阿里云短信服务、Redis的依赖。你可以在pom.xml文件中添加以下依赖:
    <!--  阿里云短信依赖  -->
    <dependency>
      <groupId>com.aliyun</groupId>
       <artifactId>aliyun-java-sdk-core</artifactId>
       <version>4.5.16</version>
     </dependency>
     <dependency>
        <groupId>com.aliyun</groupId>
        <artifactId>aliyun-java-sdk-dysmsapi</artifactId>
        <version>2.1.0</version>
   </dependency>
   <dependency>
    <groupId>org.springframework.boot</groupId>
    <artifactId>spring-boot-starter-data-redis</artifactId>
</dependency>
步骤3: 配置阿里云短信服务、Redis参数并创建工具类
在 application.properties 或 application.yml 文件中,配置阿里云短信服务的参数,包括Access Key、Secret Key、短信签名、模板代码等信息。使用 @Value 注解将这些参数注入到你的服务类中:
application.yml:
aliyun:
  sms:
    sms-access-key-id:
    sms-access-key-secret:
    sms-sign-nam:  #签名名称
    sms-template-cod: #短信模板信息
    sms-endpoint: dysmsapi.aliyuncs.com
spring:
  redis:
    host: 127.0.0.1
    port: 6379
    password:
阿里云短信服务Utils:
package com.xhblogs.utils;

import com.alibaba.fastjson.JSON;
import com.aliyuncs.DefaultAcsClient;
import com.aliyuncs.IAcsClient;
import com.aliyuncs.dysmsapi.model.v20170525.SendSmsRequest;
import com.aliyuncs.dysmsapi.model.v20170525.SendSmsResponse;
import com.aliyuncs.exceptions.ClientException;
import com.aliyuncs.profile.DefaultProfile;
import org.springframework.beans.factory.annotation.Value;
import org.springframework.stereotype.Component;

import java.util.HashMap;

@Component
public class AliyunSmsUtil {
    @Value("${aliyun.sms.sms-access-key-id}")
    private String accessKeyId;

    @Value("${aliyun.sms.sms-access-key-secret}")
    private String accessKeySecret;

    @Value("${aliyun.sms.sms-sign-nam}")
    private String signName;

    @Value("${aliyun.sms.sms-template-cod}")
    private String templateCode;

    @Value("${aliyun.sms.sms-endpoint}")
    private String endpoint;
    public boolean sendSms(String phoneNumber, HashMap<String, Object> templateParams) {
        try {
            DefaultProfile profile = DefaultProfile.getProfile("cn-hangzhou", accessKeyId, accessKeySecret);
            IAcsClient client = new DefaultAcsClient(profile);

            SendSmsRequest request = new SendSmsRequest();
            request.setPhoneNumbers(phoneNumber);
            request.setSignName(signName);
            request.setTemplateCode(templateCode);
            // 将HashMap转化为JSON字符串
            String templateParam = JSON.toJSONString(templateParams);
            request.setTemplateParam(templateParam);

            SendSmsResponse response = client.getAcsResponse(request);

            return "OK".equals(response.getCode());
        } catch (ClientException e) {
            e.printStackTrace();
            return false;
        }
    }
}
配置Redis:
@Configuration
public class RedisConfiguration {
    @Bean
    public RedisTemplate redisTemplate(RedisConnectionFactory redisConnectionFactory){
        RedisTemplate redisTemplate = new RedisTemplate<>();
        //设置redis的连接工厂对象
        redisTemplate.setConnectionFactory(redisConnectionFactory);
        //设置redis key的序列化器
        redisTemplate.setKeySerializer(new StringRedisSerializer());
        return redisTemplate;
    }
}
步骤4: 测试短信发送服务
- 从Redis中根据手机号码获取存储的验证码。如果找不到验证码(code为null),则生成一个新的四位随机验证码,并将其存储在一个HashMap中;如果Redis中已经存在验证码,说明之前已经发送过,返回一个成功的响应,提示用户不要重复发送验证码。
- 使用redisTemplate将新生成的验证码存储在Redis中,同时设置有效期为5分钟。
- 调用aliyunSmsUtil的sendSms方法,向指定的手机号码发送短信,包含新生成的验证码。
- 返回一个成功的响应,表示短信发送成功。
@GetMapping("/send/{phone}")
public ResultVo sendCode(@PathVariable String phone) {
    // 1. 从Redis中获取验证码
    String code = (String) redisTemplate.opsForValue().get(phone);
    log.info("获取到的验证码,{}", code);
    if (code == null) {
        // 2. 如果Redis中没有验证码记录,生成一个新的四位随机验证码
        String random = RandomUtil.getFourBitRandom();
        HashMap<String, Object> hashMap = new HashMap<>();
        hashMap.put("code", random);
        // 3. 将新生成的验证码存储在Redis中,设置有效期为5分钟
        redisTemplate.opsForValue().set(phone, random, 5, TimeUnit.MINUTES);
        // 4. 调用阿里云接口发送短信,将验证码发送给指定的手机号码
        boolean b = aliyunSmsUtil.sendSms(phone, hashMap);
        log.info("短信发送状态,{}", b);
        return ResultUtils.success("发送成功", StatusCode.SUCCESS_CODE);
    } else {
        // 5. 如果Redis中已存在验证码,说明已经发送过验证码,返回一个成功的响应,提示用户不要重复发送
        return ResultUtils.success("请勿重复发送验证码", StatusCode.SUCCESS_CODE);
    }
}
步骤5:验证
启动启动,新手上路大佬们勿喷
 文章来源:https://www.toymoban.com/news/detail-859433.html

 文章来源地址https://www.toymoban.com/news/detail-859433.html
到了这里,关于SpringBoot项目整合阿里云短信业务(非常详细)的文章就介绍完了。如果您还想了解更多内容,请在右上角搜索TOY模板网以前的文章或继续浏览下面的相关文章,希望大家以后多多支持TOY模板网!


