1. 说明
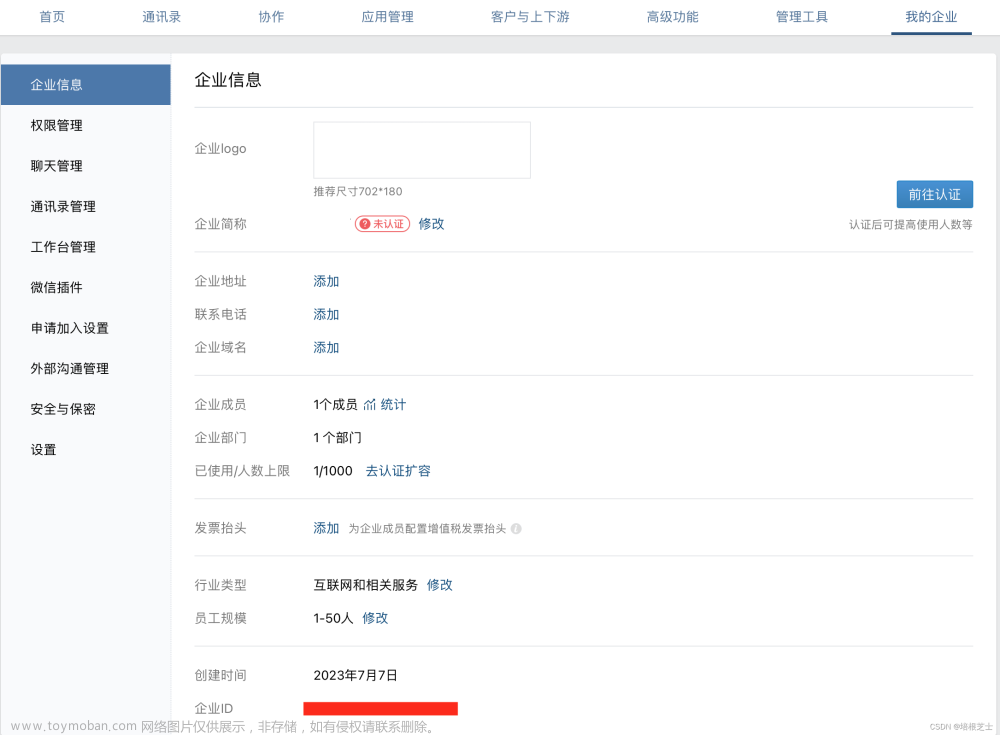
由于企业微信更新问题,现在已经无法直接使用创建应用后在alertmanager的配置文件中定义企业id及secret就可以发送告警信息了,除非填写备案后域名;为了我们这种个人开发者非常的不便,所以本文档是为了解决想使用企业微信告警但又无法备案的朋友;下面只是我的操作过程记录
如果没有自定义的需求可以直接使用我的镜像可以直接使用我的镜像:kfreesre/prometheus-flask:latest
2. 环境
我这里的监控是在kubernetes中部署的(kube-prometheus);镜像是公开的,可直接下载;告警内容可自定义;
3. 步骤
3.1 下载项目并自定义编译内容;
# clone项目(已点start)
~] git clone https://github.com/hsggj002/prometheus-flask.git

# 修改Dockerfile
~] vim prometheus-flask/Dockerfile
FROM python:3.10.2
COPY ./app /app
COPY ./requirements.txt /app/requirements.txt
WORKDIR /app
# 指定了一下国内镜像,由于requirement.txt中有要安装的包,下载又很慢,所以选择国内镜像;
RUN pip install -r /app/requirements.txt -i https://pypi.tuna.tsinghua.edu.cn/simple
# 原本是CMD的,这样我们在K8s中部署不好传参,所以改了entrypoint;
ENTRYPOINT ["python", "/app/main.py"]

# 修改requirements.txt文件
~] vim prometheus-flask/requirements.txt
flask_json == 0.3.4
flask == 2.0.1
requests == 2.19.1
gevent == 21.12.0
# 增加此行,我第一次发布镜像时报错了,加了这行得以解决;
Werkzeug == 2.0.1
3.2 修改源码
~] vim app/Alert.py
# 博主中的源码告警中多机房,所以代码中有,但我这里没有,所以去掉;
# https://github.com/hsggj002/prometheus-flask/issues/3
# 下面图一为仅修改了region参数的告警信息;但我这里想增加pod_name并且恢复告警的内容中没有定义恢复时间
# 为了解决这两个问题,我将Alert.py改了一下,可以直接使用;
# 下面图二是修改后的告警;
# -*- coding: UTF-8 -*-
from doctest import debug_script
from pydoc import describe
from flask import jsonify
import requests
import json
import datetime
import sys

def parse_time(*args):
    times = []
    for dates in args:
        eta_temp = dates
        if len(eta_temp.split('.')) >= 2:
            if 'Z' in eta_temp.split('.')[1]:
                s_eta = eta_temp.split('.')[0] + '.' + eta_temp.split('.')[1][-5:]
                fd = datetime.datetime.strptime(s_eta, "%Y-%m-%dT%H:%M:%S.%fZ")
            else:
                eta_str = eta_temp.split('.')[1] = 'Z'
                fd = datetime.datetime.strptime(eta_temp.split('.')[0] + eta_str, "%Y-%m-%dT%H:%M:%SZ")
        else:
            fd = datetime.datetime.strptime(eta_temp, "%Y-%m-%dT%H:%M:%SZ")
        eta = (fd + datetime.timedelta(hours=8)).strftime("%Y-%m-%d %H:%M:%S.%f")
        times.append(eta)
    return times

def alert(status,alertnames,levels,times,pod_name,ins,instance,description):
    params = json.dumps({
        "msgtype": "markdown",
        "markdown":
            {
                "content": "## <font color=\"red\">告警通知: {0}</font>\n**告警名称:** <font color=\"warning\">{1}</font>\n**告警级别:** {2}\n**告警时间:** {3}\n**Pod名称**: {4}\n{5}: {6}\n**告警详情:** <font color=\"comment\">{7}</font>".format(status,alertnames,levels,times[0],pod_name,ins,instance,description)
            }
        })

    return params

def recive(status,alertnames,levels,times,pod_name,ins,instance,description):
    params = json.dumps({
        "msgtype": "markdown",
        "markdown":
            {
                "content": "## <font color=\"info\">恢复通知: {0}</font>\n**告警名称:** <font color=\"warning\">{1}</font>\n**告警级别:** {2}\n**告警时间:** {3}\n**恢复时间:** {4}\n**Pod名称:** {5}\n{6}: {7}\n**告警详情:** <font color=\"comment\">{8}</font>".format(status,alertnames,levels,times[0],times[1],pod_name,ins,instance,description)
            }
        })

    return params

def webhook_url(params,url_key):
    headers = {"Content-type": "application/json"}
    """
    *****重要*****
    """
    url = "{}".format(url_key)
    r = requests.post(url,params,headers)

def send_alert(json_re,url_key):
    print(json_re)
    for i in json_re['alerts']:
        if i['status'] == 'firing':
            if "instance" in i['labels'] and "pod" in i['labels']:
                if "description" in i['annotations']:
                    webhook_url(alert(i['status'],i['labels']['alertname'],i['labels']['severity'],parse_time(i['startsAt']),i['labels']['pod'],'故障实例',i['labels']['instance'],i['annotations']['description']),url_key)
                elif "message" in i['annotations']:
                    webhook_url(alert(i['status'],i['labels']['alertname'],i['labels']['severity'],parse_time(i['startsAt']),i['labels']['pod'],'故障实例',i['labels']['instance'],i['annotations']['message']),url_key)
                else:
                    webhook_url(alert(i['status'],i['labels']['alertname'],i['labels']['severity'],parse_time(i['startsAt']),i['labels']['pod'],'故障实例',i['labels']['instance'],'Service is wrong'),url_key)
            elif "namespace" in i['labels']:
                webhook_url(alert(i['status'],i['labels']['alertname'],i['labels']['severity'],parse_time(i['startsAt']),'None','名称空间',i['labels']['namespace'],i['annotations']['description']),url_key)
            elif "Watchdog" in i['labels']['alertname']:
                webhook_url(alert(i['status'],i['labels']['alertname'],'0','0','0','故障实例','自测','0'),url_key)
        elif i['status'] == 'resolved':
            if "instance" in i['labels']:
                if "description" in i['annotations']:
                    webhook_url(recive(i['status'],i['labels']['alertname'],i['labels']['severity'],parse_time(i['startsAt'],i['endsAt']),i['labels']['pod'],'故障实例',i['labels']['instance'],i['annotations']['description']),url_key)
                elif "message" in i['annotations']:
                    webhook_url(recive(i['status'],i['labels']['alertname'],i['labels']['severity'],parse_time(i['startsAt'],i['endsAt']),i['labels']['pod'],'故障实例',i['labels']['instance'],i['annotations']['message']),url_key)
                else:
                    webhook_url(recive(i['status'],i['labels']['alertname'],i['labels']['severity'],parse_time(i['startsAt'],i['endsAt']),i['labels']['pod'],'故障实例',i['labels']['instance'],'Service is wrong'),url_key)
            elif "namespace" in i['labels']:
                webhook_url(recive(i['status'],i['labels']['alertname'],i['labels']['severity'],parse_time(i['startsAt'],i['endsAt']),'None','名称空间',i['labels']['namespace'],i['annotations']['description']),url_key)
            elif "Watchdog" in i['labels']['alertname']:
                webhook_url(alert(i['status'],i['labels']['alertname'],'0','0','0','故障实例','自测','0'),url_key)
图一
图二
3.3 制作镜像
~] docker build -t kfreesre/prometheus-flask:latest .3.4 部署至kubernetes中
apiVersion: apps/v1
kind: Deployment
metadata:
  name: alertinfo
  namespace: monitoring
spec:
  replicas: 1
  selector:
    matchLabels:
      app: alertinfo
      release: stable
  template:
    metadata:
      labels:
        app: alertinfo
        release: stable
    spec:
      containers:
      - name: alertinfo-flask
        image: kfreesre/prometheus-flask:latest
        imagePullPolicy: Always
        ports:
        - name: http
          containerPort: 80
        args:
				# 企业微信的webhook-key如何获取可以google一下;很简单,这里不说明了;
        - "-k https://qyapi.weixin.qq.com/cgi-bin/webhook/send?key=你自己的webhook-key"
        - "-p 80"
---
apiVersion: v1
kind: Service
metadata:
  name: alertinfo-svc
  namespace: monitoring
spec:
  selector:
    app: alertinfo
    release: stable
  type: ClusterIP
  ports:
  - name: http
    targetPort: 80
    port: 80
~] kubectl apply -f ./alertinfo.yaml
3.5 修改alertmanager配置
global:
  resolve_timeout: 5m
  smtp_smarthost: "xxx"
  smtp_from: "xxxx"
  smtp_auth_username: "xxx"
  smtp_auth_password: "xxx"
  smtp_require_tls: true
# 告警模板指定
templates:
  - '/etc/template/config/email.tmpl'
route:
  group_by: ['job', 'severity']
  group_wait: 30s
  group_interval: 5m
  repeat_interval: 12h
  receiver: 'wechat'
  routes:
  - match_re:
      severity: ^info|warning|critical$
    receiver: 'operation'
    continue: true
  - match_re:
      severity: ^info|warning|critical$
    receiver: 'wechat'
    continue: true

receivers:
- name: 'operation'
  email_configs:
  - to: "xxxxx"
    html: '{{ template "email.html" . }}'
    headers: { Subject: "[WARN] 报警邮件" }
    send_resolved: true
#receivers:
- name: 'wechat'
  webhook_configs:
	# 这里是svc的名称;
  - url: 'http://alertinfo-svc/alertinfo'
    send_resolved: true
inhibit_rules:
  - source_match_re:
      severity: 'critical|warning'
    target_match:
      severity: 'info'
    equal:
    - instance
4. 参考
使用企业微信群机器人接收prometheus报警信息 - hsggj - 博客园 (cnblogs.com)文章来源:https://www.toymoban.com/news/detail-861019.html
https://github.com/hsggj002/prometheus-flask文章来源地址https://www.toymoban.com/news/detail-861019.html
到了这里,关于Alertmanager实现企业微信机器人webhook告警的文章就介绍完了。如果您还想了解更多内容,请在右上角搜索TOY模板网以前的文章或继续浏览下面的相关文章,希望大家以后多多支持TOY模板网!


